This week, I started studying the course Advanced Data Structures in Java on Coursera. Partly because I wanted to brush up my data structure knowledge, partly because the summertime is always a good period to do some study.
The running application at this course is a Google Maps API, of which the start up code was provided as a downloadable zip. This zip, as the lectures, assume you are using Eclipse as an IDE, with Java language level 8. Last September, however, I switched from Eclipse to IntelliJ, using language level 11. As I did not want to reinstall either Eclipse or Java 8, I decided to spend an afternoon porting the project to IntelliJ with level 11.
pom.xml
The project uses JavaFX, which on OS-X requires a lot of dependencies. The first task I set myself to, was to create a pom.xml file so that all those dependencies would be installed by Maven. However, it turned out that not all required jars were available as maven-repo, and that JavaFX also required something called Dynamic Libraries, which are not supported by Maven (though perhaps some other dependency manager could be of help in this regard).
Later, when the time came to run the project, another reason not to use maven to install the jars became apparent, so I ended up making a separate lib-directory with all the jars and dylibs in it. The contents of this directory is provided in this zip-file.
Starting with IntelliJ
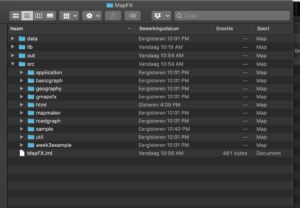
First create a new plain Java project in IntelliJ and copy the lib-directory to the root of this new project. After that, copy the contents of the src-directory of the downloaded zip to the src-directory of this new project. Next to the lib-directory, copy the data-directory, which is also provided. So the directory-structure of the project looks as follows:
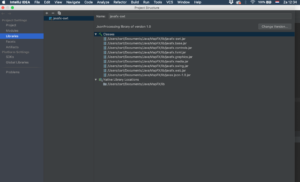
To make the jars at the lib-directory available to the java-classes that use them, you have to add them all to the project as library. Go to Project Settings -> Libraries, hit the addition sign and navigate to the lib-directory with all the jars (you could of course put all actual jars at a different place and just provide the project with the correct directory, but this is my personal preference).
Now, when you try to build the project, sometimes IntelliJ will complain about the language level. There are actually three places where you must provide the language level: two times at Project Settings -> Project and once at Preferences -> Build, Execute, Deployment -> Compiler -> Java Compiler (this last place has ‘Same as language level’ as a default, but in my experience it’s better to make the level explicit). Now, you should be able to build the project without any Java errors.
Running with language level 11
Now if you navigate to MapApp.java and try to run the static void main, you will encounter an IllegalAccessError. This is due to the fact that starting with level 9, Java uses a stronger module system that encapsulates all the packages. As a consequence, only modules that ship with the JDK (basically java.* and javax.*) are accessible without hassle; all other packages must be explicitly named (see this blog for a good explanaition of this situation).
To do so, we must change the run configuration
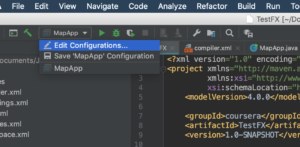
and must add the following VM options:
--module-path ./lib
--add-modules javafx.controls,javafx.fxml,javafx.web
This tells the VM that the modules are located in the ./lib-directory and which modules in that directory it must access (there is some kind of recursive system that prevents us from having to name all the jars explicit). Now, if we were to use maven after all, instead of ./lib we could point the VM to the directory where maven puts its downloaded jars (on my system, that would be ~/.m2/repository/), but since we need to manually include the dylibs anyway, I didn’t bother to change this (even though in fact it would be the better architecture – for those interested I provide the pom.xml).
After these changes, you should be able to start the application.
Obtaining the Google API key.
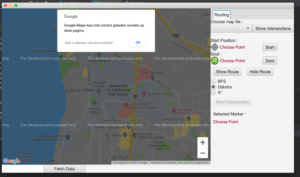
The last challenge before setting off to the actual assignments is to have the google maps api work in this web browser. Head over to google developers and read the documentation.
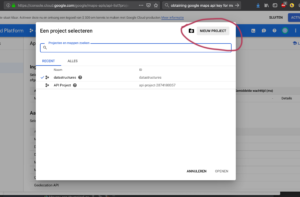
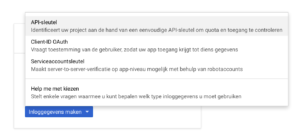
You need to have a Google account in order to be able to obtain an API key. Head over to the console view and click on the hamburger menu on the top left. Click on Projects and Create New Project. Next, select the project and click on ‘APIs and Services’ and select ‘Credentials’. On the screen that appears, click ‘Create Credentials’ and select ‘Api Key’. This will create a key that you can use in the application. Remember to restrict the use of the key (for this course, restricting on IP address seems the most logical option).
It seems that the key is restricted to one call per day, which is a bit too harsh for development purposes. However, it is possible to get $300 worth of data storage and traffic. For this, you need to supply Google with billing information and a credit card number. According to the docs, this step is only needed to verify that you are not a robot; charging will only take place after a manually selected update of the free account.
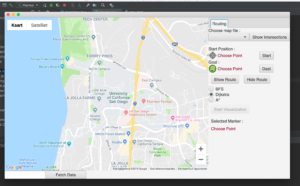
Once you have the API key, copy this in the file index.html, in the directory html. Once you have done this, everything should run smooth and you can at long last start with the first assignment.
A better solution to this problem would be to use an open source variant, such as openstreetmap or leafletjs, but this would require a major refactoring of the code, so that is not really an option.